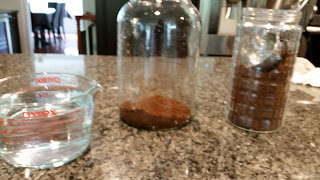
I love coffee. End of post. 😄
No seriously, I love coffee, in all forms and at any time of the day, although I do try to drink it in moderation for the most part. In the summer, there's nothing quite like an iced coffee to really brighten your day. Especially now that it's getting into those "feels like we're walking through soup" mornings, a cold glass of coffee hits the spot!
Last year, I noticed that every house I went to had something called cold brew coffee. I know, I was probably a year behind the trend. 😏 But anyway, so I went to the grocery store and decided to try it. I bought a few different brands, and they were all pretty good. "brewed" over a long period of time giving it a really smooth finish. Each one ran about $10. And there were probably 5-8 drinks worth in each bottle, so not a bad deal at all. But you know, I don't like to leave well enough alone. So after I finished the store bought versions, I decided to try making it myself. Well, not only was it super easy. But it's also super delicious AND super cheap. Plus you get to use your favorite brand of coffee and get exactly the taste you love! So are you ready? Let's do this!
Ingredients/Tools:
Coarsely ground coffee
Approximately 16-32 ounce Mason Jar or sufficiently large bottle with lid
Filtered Water
Funnel
Coffee Filter
Container to filter coffee into
Container to store coffee in the fridge
Instructions:
Note: I used a 4:1 ratio for my coffee. So that means for every cup of coffee grounds, you'd use 4 cups of water. So to follow that, if you make 1 cup of coffee, you'd use 1/4 cup of coffee grounds...! It's that simple! This creates a pretty concentrated coffee so you can add in your milk or ice or just as is if you like shots of cold coffee!
Step 1: Decide how much coffee you're going to make. I'd suggest you start small in case for some crazy reason you don't like what you make. I did a larger batch this time, cause I knew I liked it. So I used 2 cups of coffee grounds. I had really large container, but if you have a 32 ounce mason jar or large enough bottle, that will work fine.
Step 2: Add in 4x water. I had 2 cups of grounds so 4x2=8 cups of water.
Step 3: Let sit on your counter or fridge for 12-24 hours.I left mine on the counter. The longer you let it sit, the more concentrated it will be.
Step 4: Filter out the grounds. I did this in two steps and filtered with a mesh strainer, and then with a coffee filter. You could just try the mesh filter, but I found it left too much sludge in the coffee and I didn't enjoy it.
Part 1)
 |
| I had another container of the same size so I knew all the coffee would fit |
 |
| The strainer is lopsided.... |
 |
| Genius technique to hold a strainer that is lopsided. 😃 |
Part 2)
 |
| I saved the cold brew coffee bottles I'd purchased and just used them to hold the final product |
 |
| Place a funnel on top of the bottle so there's no spillage, and then place the coffee filter inside the funnel |
 |
| I had enough for two bottles, so I had them going at the same time. Aren't I just fancy! |
 |
| I drink my coffee black, so I just added a bit of water to it. |
 |
| And then I also had some with ice! So delicious! |


0 comments:
Post a Comment